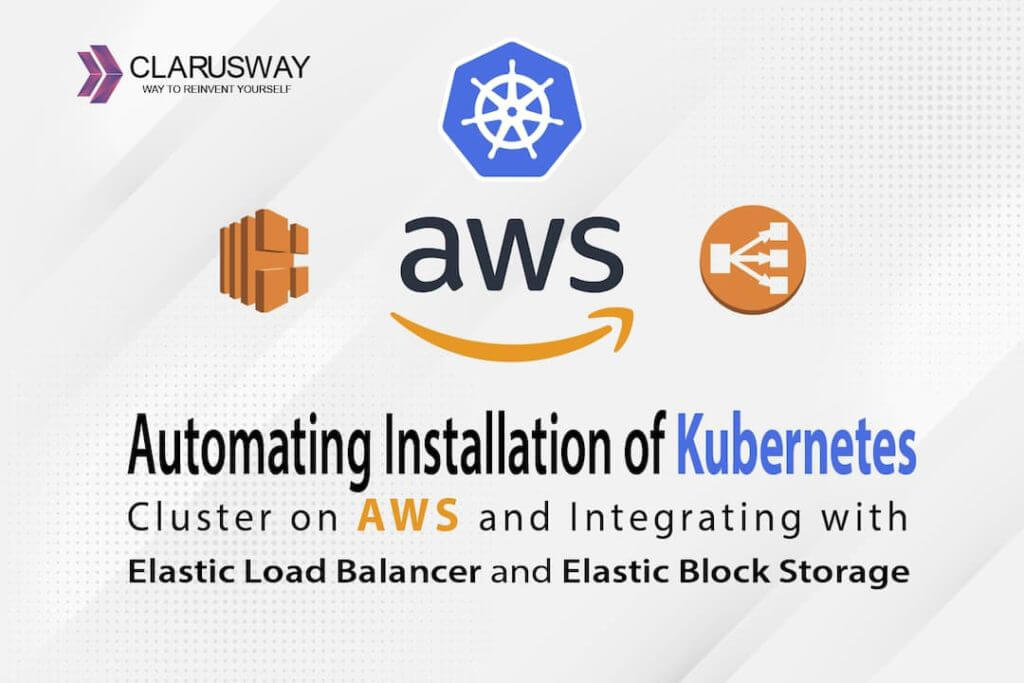
TLDR: This work aims to explain how to create a Kubernetes Cluster on AWS EC2 instances and how to use AWS resources (Elastic Load Balancer-ELS and Elastic Block Storage-EBS) within the cluster. We will create the infrastructure with Terraform and configure it with Ansible.
Overall Table of Contents:- Part 1: Creating the Kubernetes Infrastructure with Terraform
- Part 2: Configuring the Infrastructure with Ansible – Basic Kubeadm Cluster
- Part 3: Configuring the Infrastructure with Ansible – Components to Interact with AWS Cloud Controller Manager and EBS Container Storage Interface Driver
- Part 4: Let’s Check if Everything is OK
Part 1: Creating the Kubernetes Infrastructure with Terraform
In this work, I’m trying to create an environment for my Kubernetes studies. I don’t want to use Minikube because it doesn’t allow me to play around with the heavy workloads of some Kubernetes implementations due to the lack of resources with my local environment. I also don’t want to use another virtual environment on my computer yet. So these things lead me to use Amazon Web Services. But, I do still have an issue to consider because a managed service, Elastic Kubernetes Service, is a very nice but expensive service. Also, I don’t like being limited to not interacting with my control plane. So I decided to create my Kubernetes Cluster on EC2 instances. One of the easy ways to configure a Kubernetes platform is using the Kubeadm tool, which I used throughout this tutorial.
As I have mentioned above, my intention here is to create a temporary environment for my studies. I want to create this environment in a short period of time, and then after my studies, I’m going to collapse everything down for not being charged very much.
Two top-rated tools of Infrastructure as Code are here to help: Terraform and Ansible. I will create the infrastructure with Terraform because it’s very good at managing the lifecycle of the infrastructure. Then I will configure it with Ansible because it’s very good at configuring the instances with its being Idempotent.
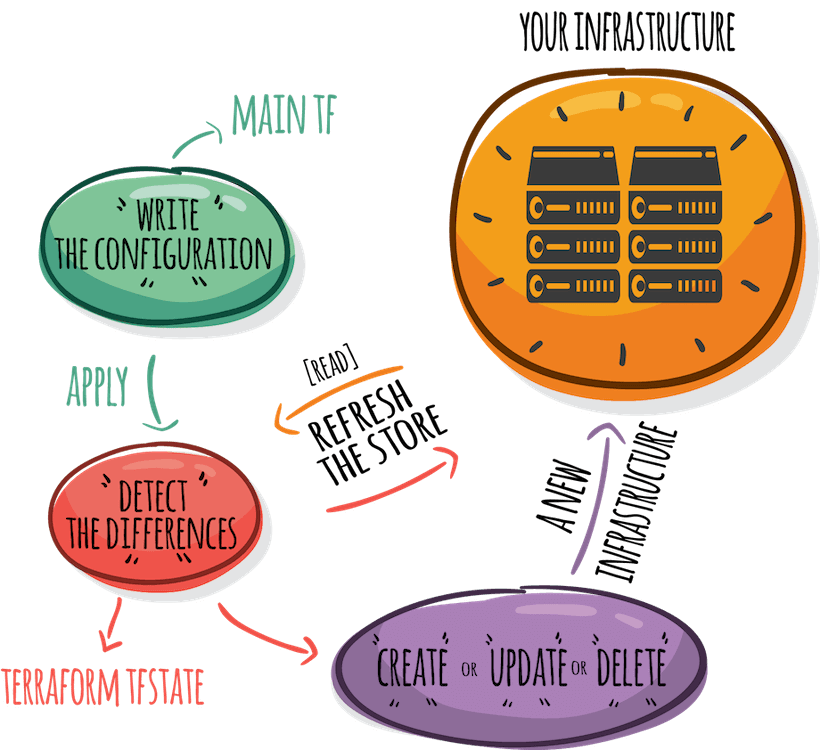
So let’s start with Terraform and create a “main.tf” file. With this file, we are planning to create an infrastructure for our cluster. In this cluster, I will have one master node and two worker nodes. Therefore, we will create 3 EC2 instances, 2 different security groups (one is for the control plane and the other is for the worker nodes), and 2 different roles (one is for the control plane and the other is for the worker nodes). Since the two roles require many resources like policies, instance profiles, and policy attachments, I will put them into a different module. With this modification, the main.tf file will have three instances, two security groups, 1 module, and of course, an AWS Provider. The provider will have the basic lines as shown below.
  provider "aws" {
  region = “us-east-1”
  profile = ""
  }
In this provider section, all you need to do is put the region you will be working in and the name of your profile (“default” if you don’t have multiple accounts). I assume that you already know about the “aws configure” CLI utility or your “credentials” and “config” files under the “~/.aws” folder.
Now we will add the security groups into the file. First of all, it can be a better approach to create those security groups via AWS Console, and then you can either import them into Terraform or directly assign them to your instances.
If you want to create the security groups via Terraform, you may encounter an error called Cycle Error. It’s because some of the ports on the control plane will be open for worker nodes, and some of the ports on your worker nodes will be open for the control plane. The easiest way to open those ports mutually is to assign the security groups mutually. But on the other hand, if you use those security groups there, they will depend on each other, and there won’t be a sequence to create one before the other, which is the thing that Terraform doesn’t like.
However, we have a work around here. We can create an extra empty security group and assign it to those ports within other security groups. So we can establish that mutual dependency via a helper security group. Those security groups are as shown below.
resource "aws_security_group" "matt-kube-mutual-sg" {
  name = "kube-mutual-sec-group-for-matt"
  tags = {
    Name = "kube-mutual-secgroup"
  }
}

resource "aws_security_group" "matt-kube-worker-sg" {
  name = "kube-worker-sec-group-for-matt"
  ingress {
    protocol = "tcp"
    from_port = 10250
    to_port = 10250
    security_groups = [aws_security_group.matt-kube-mutual-sg.id]
  }
  ingress {
    protocol = "tcp"
    from_port = 30000
    to_port = 32767
    cidr_blocks = ["0.0.0.0/0"]
  }
  ingress {
    protocol = "tcp"
    from_port = 22
    to_port = 22
    cidr_blocks = ["0.0.0.0/0"]
  }
  ingress {
    protocol = "udp"
    from_port = 8472
    to_port = 8472
    security_groups = [aws_security_group.matt-kube-mutual-sg.id]
  }
  egress{
    protocol = "-1"
    from_port = 0
    to_port = 0
    cidr_blocks = ["0.0.0.0/0"]
  }
  tags = {
    Name = "kube-worker-secgroup"
    "kubernetes.io/cluster/mattsCluster" = "owned"
  }
}

resource "aws_security_group" "matt-kube-master-sg" {
  name = "kube-master-sec-group-for-matt"
  ingress {
    protocol = "tcp"
    from_port = 22
    to_port = 22
    cidr_blocks = ["0.0.0.0/0"]
  }
  ingress {
    protocol = "tcp"
    from_port = 6443
    to_port = 6443
    cidr_blocks = ["0.0.0.0/0"]
  }
  ingress {
    protocol = "tcp"
    from_port = 2380
    to_port = 2380
    security_groups = [aws_security_group.matt-kube-mutual-sg.id]
  }
  ingress {
    protocol = "tcp"
    from_port = 2379
    to_port = 2379
    security_groups = [aws_security_group.matt-kube-mutual-sg.id]
  }
  ingress {
    protocol = "tcp"
    from_port = 10250
    to_port = 10250
    security_groups = [aws_security_group.matt-kube-mutual-sg.id]
  }
  ingress {
    protocol = "tcp"
    from_port = 10251
    to_port = 10251
    security_groups = [aws_security_group.matt-kube-mutual-sg.id]
  }
  ingress {
    protocol = "tcp"
    from_port = 10252
    to_port = 10252
    security_groups = [aws_security_group.matt-kube-mutual-sg.id]
  }
  egress {
    protocol = "-1"
    from_port = 0
    to_port = 0
    cidr_blocks = ["0.0.0.0/0"]
  }
  tags = {
    Name = "kube-master-secgroup"
  }
}
You can find most of these ingress rules in the official documentation (https://kubernetes.io/docs/setup/production-environment/tools/kubeadm/install-kubeadm/). But, there are other rules that you have to add since we want to create a virtual LAN among the worker nodes. According to the same documentation, we want this because any service within Kubernetes could be reachable from any IP address in the cluster. So any request should be proxied to the right node or to the right pod. In order to establish this virtual network, namely that virtual extensible local area network (vxlan), we have to open the UDP port 8472 if you are using Flannel as your pod network. In our example, we want the worker nodes to be reachable from the outside world in a port range of 30000 to 32767. Also, you can open port 22 for ssh access.
Another important part is the tagging. Because AWS Cloud Controller Manager will catch our instances with those tags, you should tag your network nodes, including the subnet, security group, and the instances using this security group. Here we did not tag the control plane security group because we don’t want the load balancer to target that instance.
Now we need to configure the roles necessary for the cluster to interact with the AWS API. As I have mentioned above, roles are going to be in a different module. So the module configuration in the root main.tf file will be as shown below.
module "iam" {
  source = "./modules/IAM"
}
These two lines just reference the directory where the main.tf file is located. So let’s create a folder with the name “modules” and create another one named “IAM” within the folder “modules”. Then create a second main.tf file with the configuration as shown below.
resource "aws_iam_policy" "policy_for_master_role" {
  name = "policy_for_master_role"
  policy = file("./modules/IAM/policy_for_master.json")
}

resource "aws_iam_policy" "policy_for_worker_role" {
  name = "policy_for_worker_role"
  policy = file("./modules/IAM/policy_for_worker.json")
}

resource "aws_iam_role" "role_for_master" {
  name = "role_master_k8s"
  assume_role_policy = jsonencode({
    Version = "2012-10-17"
    Statement = [
      {
        Action = "sts:AssumeRole"
        Effect = "Allow"
        Sid = ""
        Principal = {
          Service = "ec2.amazonaws.com"
        }
      },
    ]
  })

  tags = {
    Name = "role_for_master"
  }
}

resource "aws_iam_role" "role_for_worker" {
  name = "role_worker_k8s"
  assume_role_policy = jsonencode({
    Version = "2012-10-17"
    Statement = [
      {
        Action = "sts:AssumeRole"
        Effect = "Allow"
        Sid = ""
        Principal = {
          Service = "ec2.amazonaws.com"
        }
      },
    ]
  })

  tags = {
    Name = "role_for_worker"
  }
}

resource "aws_iam_policy_attachment" "attach_for_master" {
  name = "attachment_for_master"
  roles = [aws_iam_role.role_for_master.name]
  policy_arn = aws_iam_policy.policy_for_master_role.arn
}

resource "aws_iam_policy_attachment" "attach_for_worker" {
  name = "attachment_for_worker"
  roles = [aws_iam_role.role_for_worker.name]
  policy_arn = aws_iam_policy.policy_for_worker_role.arn
}

resource "aws_iam_instance_profile" "profile_for_master" {
  name = "profile_for_master"
  role = aws_iam_role.role_for_master.name
}

resource "aws_iam_instance_profile" "profile_for_worker" {
  name = "profile_for_worker"
  role = aws_iam_role.role_for_worker.name
}

output master_profile_name {
  value = aws_iam_instance_profile.profile_for_master.name
}

output worker_profile_name {
  value = aws_iam_instance_profile.profile_for_worker.name
}
The first two resources are just for fetching the policy documentation, which is in JSON format. So the policy part is very easy, and this is the reference for the control plane, and this is the reference for the worker nodes. Since we will be interacting with AWS EBS and ELB services at the end of this tutorial, the policies contain the necessary permissions.
The strategy while creating and assigning a role, for instance, is that you first create a policy, then create a role, attach that policy to that role, and create an instance profile where you reference the necessary role. Later on, you will reference that instance profile within the instance you want to assign that specific role. The code above does that, and also it outputs the deliverables out of this file because otherwise, you cannot reference a resource out of a module.
Now let’s return to our root main.tf file. We will only add three more resources which are the instances that we will create for our cluster. We will use Ubuntu Server 18.04 as our AMI, and the size of the instance will be “t2.medium”. Most probably, smaller sizes will not work. The instances will be created within the same subnet, and the tagging will be appropriate for Ansible’s dynamic inventory to find our instances dynamically. The configuration for the control plane instance is as shown below.
resource "aws_instance" "kube-master" {
    ami = "ami-013f17f36f8b1fefb"
    instance_type = "t2.medium"
    iam_instance_profile = module.iam.master_profile_name
    vpc_security_group_ids = [aws_security_group.matt-kube-master-sg.id, aws_security_group.matt-kube-mutual-sg.id]
    key_name = "mattskey"
    subnet_id = "subnet-c41ba589"
    availability_zone = "us-east-1a"
    tags = {
        Name = "kube-master"
        "kubernetes.io/cluster/mattsCluster" = "owned"
        Project = "tera-kube-ans"
        Role = "master"
        Id = "1"
    }
}
As you can see, the “vpc_security_group_ids” property has two security groups. One of them is the empty security group that we have created for working around that cyclic dependency error. The “Project” and the “Role” properties under the “tags” property will be used to create the keyed groups while we are configuring the instances with Ansible. The second tag is necessary for the instance to be recognized as an instance under our Kubernetes Cluster. If you assign “shared” instead of “owned” to that tag named “kubernetes.io/cluster/mattsCluster”, AWS will assume that some other cluster shares this instance, and it’s not going to be terminated when the cluster is terminated. Worker instance configuration will be very much similar. The “Role” and “Id” property under “tags” property, “iam_instance_profile” property, and the “vpc_security_group_ids” property will be changed accordingly. The configuration is as follows.
resource "aws_instance" "worker-1" {
    ami = "ami-013f17f36f8b1fefb"
    instance_type = "t2.medium"
    iam_instance_profile = module.iam.worker_profile_name
    vpc_security_group_ids = [aws_security_group.matt-kube-worker-sg.id, aws_security_group.matt-kube-mutual-sg.id]
    key_name = "mattskey"
    subnet_id = "subnet-c41ba589"
    availability_zone = "us-east-1a"
    tags = {
        Name = "worker-1"
        "kubernetes.io/cluster/mattsCluster" = "owned"
        Project = "tera-kube-ans"
        Role = "worker"
        Id = "1"
    }
}

resource "aws_instance" "worker-2" {
    ami = "ami-013f17f36f8b1fefb"
    instance_type = "t2.medium"
    iam_instance_profile = module.iam.worker_profile_name
    vpc_security_group_ids = [aws_security_group.matt-kube-worker-sg.id, aws_security_group.matt-kube-mutual-sg.id]
    key_name = "mattskey"
    subnet_id = "subnet-c41ba589"
    availability_zone = "us-east-1a"
    tags = {
        Name = "worker-2"
        "kubernetes.io/cluster/mattsCluster" = "owned"
        Project = "tera-kube-ans"
        Role = "worker"
        Id = "2"
    }
}
That’s it for Part 1 – Creating the Kubernetes Infrastructure with Terraform. All you have to do is to run “terraform init” and “terraform apply”. In Part 2, we will see how to configure these instances to create our Kubernetes Cluster.