What is a Container Registry?
The containers are created from the images. These images need to be stored and used from a scalable and secure repository. Like the other repositories, the container registry also must provide a fast way to pull and push images with correct policies and credentials.
The most popular container registry hosting the images is Docker Hub. The Docker and Kubernetes are usually using the images via this service. There are many public images freely available, but you don’t have full control over the registry, and day by day, you will meet with some restrictions. Moreover, when it comes to using private images, security is a concern, and it may also be expensive.
Therefore, hosting your private registry can be useful in many situations. Private registries offer many different storage and authentication options and can be customized according to your personal needs.
Why Use a Private Container Registry?
Here are some basic reasons for using your personal private registry instead of a public registry like DockerHub.
- You have full control over the storage location of the private registry.
- You can set up policies as you wish
- Wide options to secure and share your images
- Special configuration options for logging, authentication, load balancing, etc.
There are some images like DockerHub’s registry and CNCF’s Harbor to configure and use as a private registry. In this study, we will go on with DockerHub’s registry image.
AWS ec2-instance Security Settings for Container Registry
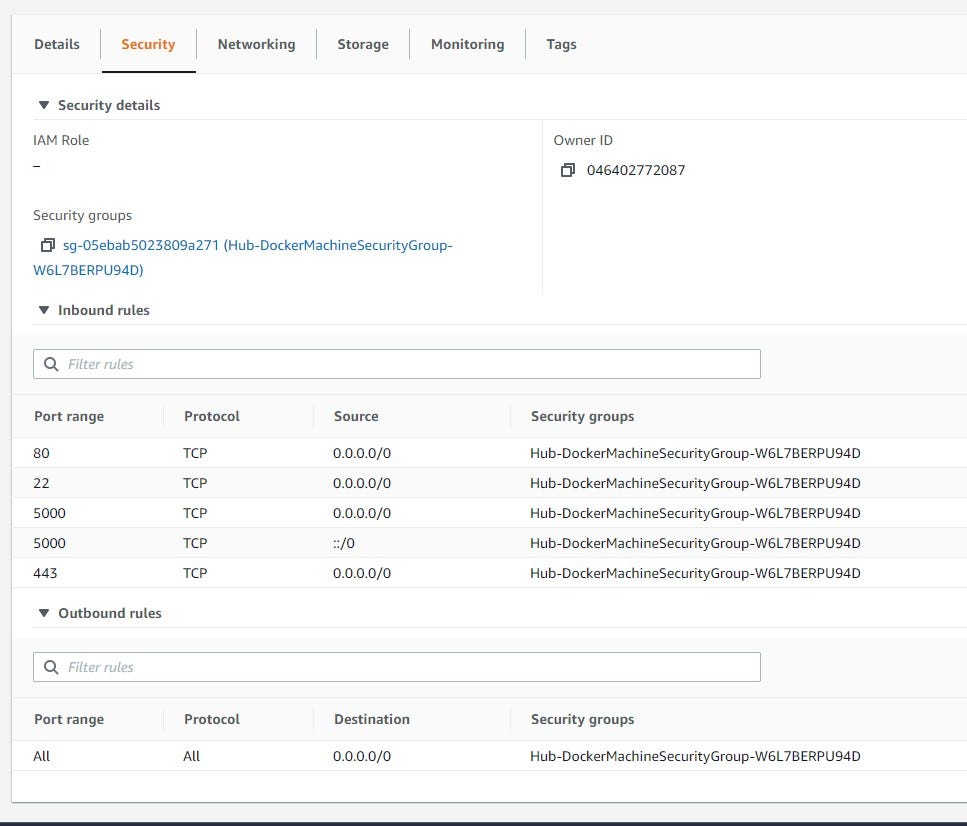
We will deploy the registry to an AWS ec2-instance for the showcase. It will host the image repository. That’s why it is important to emphasize the security group permissions.
HTTP   TCP 80   IP: 0.0.0.0/0 -
HTTP   TCP 443, IP: 0.0.0.0/0 -
SSH    TCP 22   IP: 0.0.0.0/0 -
Custom TCP 5000 IP: 0.0.0.0/0 -
Custom TCP 5000 IP: ::/0 -
Create a Simple Registry
Let’s create a folder to start our journey at the home directory;
mkdir -p docker-hub/data
chmod 777 -R docker-hub/data
The data the folder will store the registry data.
We will use docker-compose structure to create and manage the registry.
To create a simple registry, we can use a basic registry image from Docker Hub. The docker-compose.yaml file content is as follows:
version: '3'
services:
  docker-registry:
    image: registry:2
    restart : always
    container_name: docker-registry
    ports:
    - "5000:5000"
    environment:
      REGISTRY_STORAGE_FILESYSTEM_ROOTDIRECTORY: /data
    volumes:
      - ./data:/data
The directory structure is as follows:
docker-hub
├── data
└── docker-compose.yaml
Now, run the docker-compose under docker-hub directory.
docker-compose up -d
Pushing an Image to the Registry
The registry is ready to store the images. To do that, we need to create an image that is labeled correctly. The correct convention for labeling is as follows:
:/:
:/:
For example, we can pull an image from the docker hub, or create an image from scratch and tag it for our private registry.
docker pull alpine
docker tag alpine localhost:5000/my-alpine
To push the image, we need to login into our private registry if it requires the credentials.
docker login localhost:5000
Now we can push the image using the push command:
docker push localhost:5000/my-alpine
Pulling an Image from the Registry
The pulling of images from the private registry is very straightforward. Again, to pull the image, we need to login into our private registry if it requires credentials.
docker login localhost:5000
Now we can pull the image using the pull command:
docker push localhost:5000/my-alpine
Adding Web Service to the Private Registry
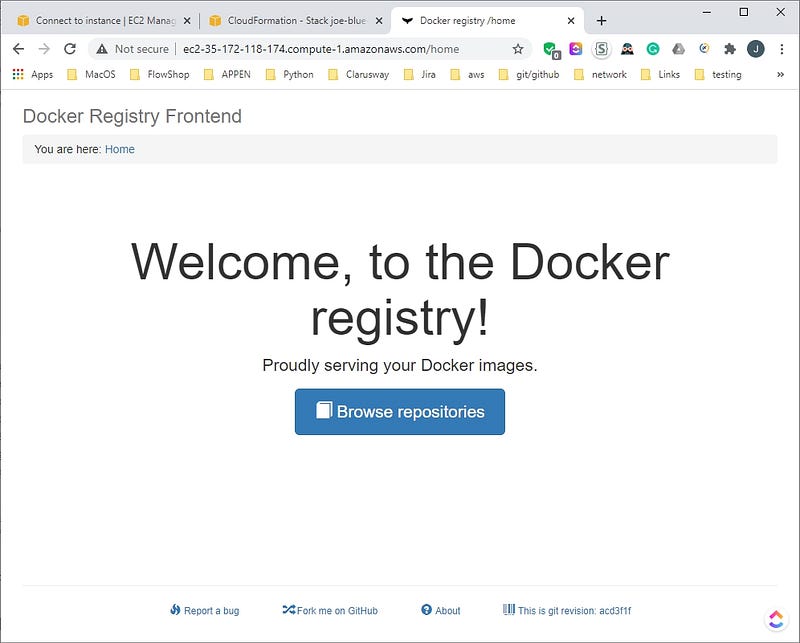
It is a good idea to monitor or see the images via a web browser, as in Docker Hub. To realize this, we can use konradkleine/docker-registry-frontend images. There is enough configuration information on the related documentation page. The docker-compose.yaml file is updated to capture this feature.
version: '3'
services:
  docker-registry:
    image: registry:2
    restart : always
    container_name: docker-registry
    ports:
    - "5000:5000"
    environment:
      REGISTRY_STORAGE_FILESYSTEM_ROOTDIRECTORY: /data
    volumes:
      - ./data:/data
docker-registry-ui:
    image: konradkleine/docker-registry-frontend:v2
    restart : always
    container_name: docker-registry-ui
    ports:
    - 80:80
    environment:
      ENV_DOCKER_REGISTRY_HOST: ip-172-31-82-125.ec2.internal
      ENV_DOCKER_REGISTRY_PORT: 5000
For the ENV_DOCKER_REGISTRY_HOST, we could use a service name, but as we intend to use this registry as a service, we need a secure SSL connection and a reachable ip or dns name. That is why we used ip-172–31–82–125.ec2.internal, which is reachable from the AWS network internally. A DNS name can also be used instead of this static IP. You can also set the storage location with the help of an environment variable, REGISTRY_STORAGE_FILESYSTEM_ROOTDIRECTORY.
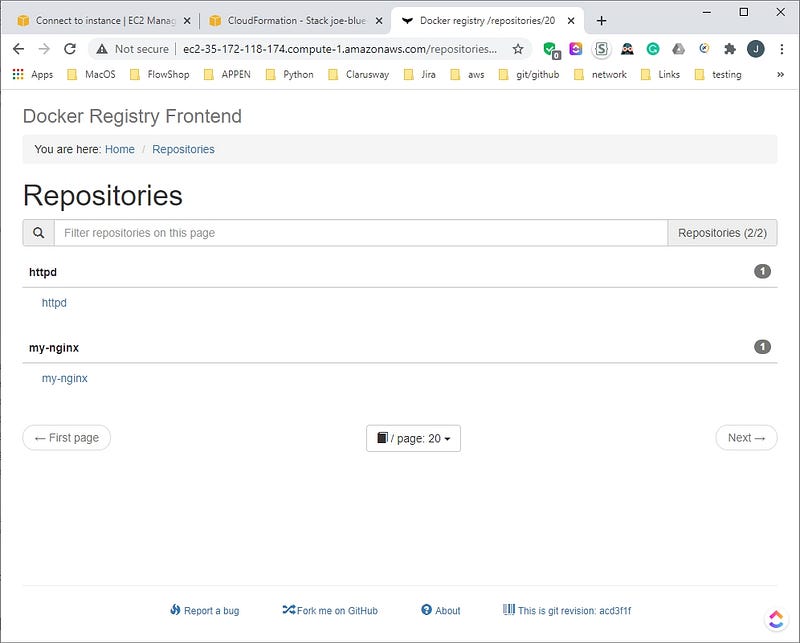
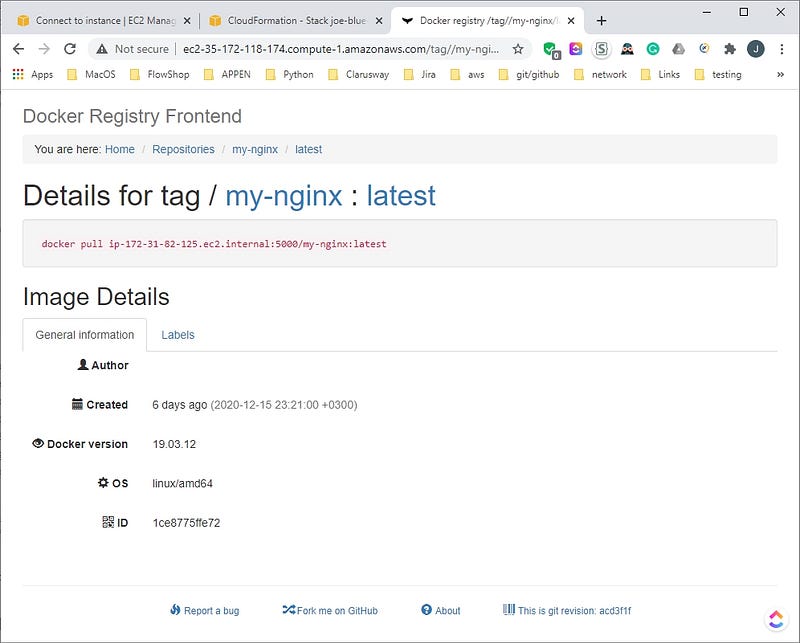
We have added the my-nginx and httpd images to the registry. The web browser screenshots are presented.
Adding a Certificate to the Registry
For a secure connection and remote client access, you need certificates. We will show to configure a secure connection with SSL certificates. If you already acquired a .cert and .key from your Certification Authority, then you just need the copy them to under certs directory. Go to docker-hub and then,
mkdir certs
chmod 777 -R certs
Now copy the .crt and .key file to certs directory.
If you don’t have them, here is a way of creating the Certification Authorization Key. For this purpose, we need the openssl package. If openssl not present, install it.
yum -y install openssl
Let’s create certification keys for docker-registry. Command prompt must be at the same level as certs folder. Run the command as follows;
openssl req
  -newkey rsa:4096 -nodes -sha256 -keyout ./certs/domain.key
  -x509 -days 3650 -out ./certs/domain.crt
When creating keys, Common Name (eg, your name or your server’s hostname) part is critical. It must be the hostname/ip of the docker-registry host. When AWS considered, private ip/hostname of docker-registry the host can be used. The private IP of an ec2 instance is like ip-172–31–82–125.ec2.internal. You can go with defaults (just press enter) or enter the appropriate values for the rest.
[ec2-user@ip-172-31-82-125 docker-hub]$ openssl req
>   -newkey rsa:4096 -nodes -sha256 -keyout ./certs/domain.key
>   -x509 -days 3650 -out ./certs/domain.crt
Generating a 4096 bit RSA private key
...............................................................................++
.......................................................................................................................................................++
writing new private key to './certs/domain.key'
-----
You are about to be asked to enter information that will be incorporated
into your certificate request.
What you are about to enter is what is called a Distinguished Name or a DN.
There are quite a few fields but you can leave some blank
For some fields there will be a default value,
If you enter '.', the field will be left blank.
-----
Country Name (2 letter code) [XX]:
State or Province Name (full name) []:
Locality Name (eg, city) [Default City]:
Organization Name (eg, company) [Default Company Ltd]:
Organizational Unit Name (eg, section) []:
Common Name (eg, your name or your server's hostname) []:ip-172-31-82-125.ec2.internal
Email Address []:
Adding a Certificate to the Registry with the Help of openssl.conf File
You can also use a file to set the openssl configuration settings as an alternative. For this, prepare an openssl.conf file for your needs. We will use the following settings for the parameters:
[ req ]
distinguished_name = req_distinguished_name
x509_extensions     = req_ext
default_md         = sha256
prompt             = no
encrypt_key        = no
[ req_distinguished_name ]
countryName            = "US"
localityName           = "Bristow"
organizationName       = "Clarusway"
organizationalUnitName = "Clarusway"
commonName             = "ip-172-31-82-125.ec2.internal"
emailAddress           = "test@example.com"
[ req_ext ]
subjectAltName = @alt_names
[alt_names]
DNS = “ip-172-31-82-125.ec2.internal”
Run the command as follows;
openssl req
 -x509 -newkey rsa:4096 -days 3650 -config openssl.conf
 -keyout certs/domain.key -out certs/domain.crt
The command output should look like this.
openssl req
>  -x509 -newkey rsa:4096 -days 3650 -config openssl.conf
>  -keyout certs/domain.key -out certs/domain.crt
Generating a 4096 bit RSA private key
...........................................++
...............++
writing new private key to 'certs/domain.key'
-----
The folder structure should be like this.
docker-hub
├── certs
│   ├── domain.crt
│   └── domain.key
├── data
└── docker-compose.yaml
Now, it is time to update the docker-compose.yaml file to include the certificates.
version: '3'
services:
  docker-registry:
    image: registry:2
    restart : always
    container_name: docker-registry
    ports:
    - "5000:5000"
    environment:
      REGISTRY_HTTP_TLS_CERTIFICATE: /certs/domain.crt
      REGISTRY_HTTP_TLS_KEY: /certs/domain.key
      REGISTRY_STORAGE_FILESYSTEM_ROOTDIRECTORY: /data
    volumes:
      - ./certs:/certs
      - ./data:/data
docker-registry-ui:
    image: konradkleine/docker-registry-frontend:v2
    container_name: docker-registry-ui
    ports:
    - 443:443
    environment:
      ENV_DOCKER_REGISTRY_HOST: ip-172-31-82-125.ec2.internal
      ENV_DOCKER_REGISTRY_PORT: 5000
      ENV_USE_SSL: "yes"
      ENV_DOCKER_REGISTRY_USE_SSL: 1
    volumes:
      - ./certs/domain.crt:/etc/apache2/server.crt:ro
      - ./certs/domain.key:/etc/apache2/server.key:ro
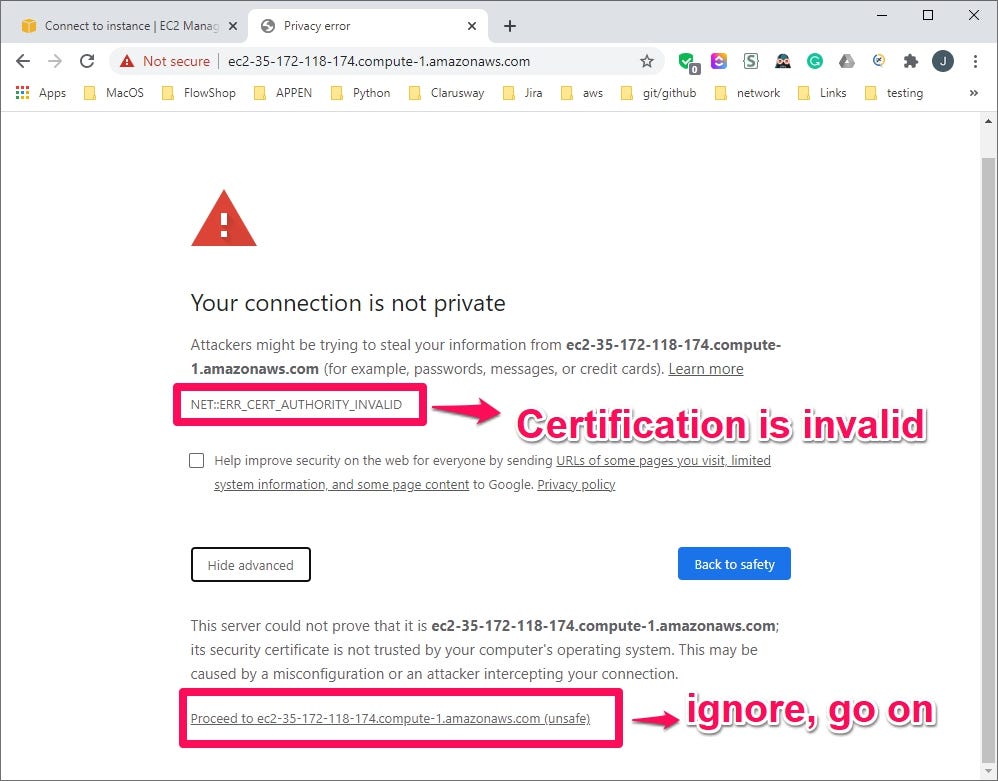
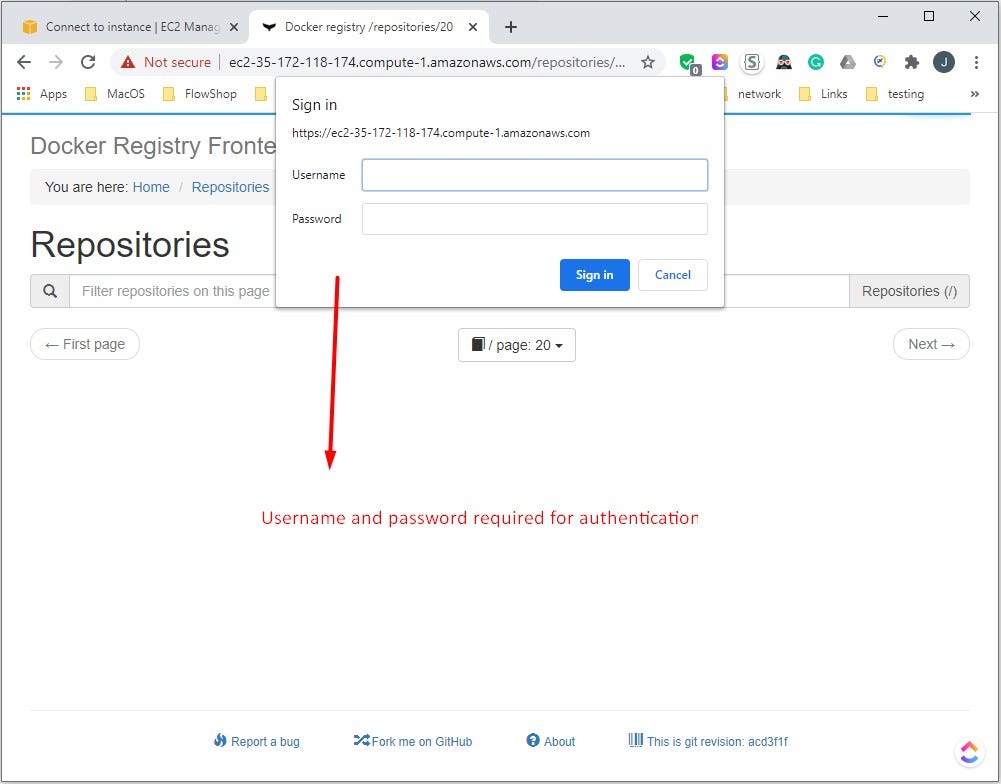
This time, for the web browser link, we have to use https connection. In our case, https://ec2-35-172-118-174.compute-1.amazonaws.com/ will be used. As we get a certificate for a private IP address (ip-172–31–82–125.ec2.internal), we can ignore the security warning and go on.
Client Machine Settings to Use the Registry
The domain.crt must be copied to the clients. The path should be /etc/docker/certs.d/:/. In our case, copy the file to the clients and then at clients move the file to the correct path with root privileges (with sudo or root user):
[root@docker-client1 ~]# mkdir -p /etc/docker/certs.d/ip-172-31-82-125.ec2.internal:5000/
[root@docker-client1 ~]# cp -rf ./domain.crt /etc/docker/certs.d/ip-172-31-82-125.ec2.internal:5000/
The domain.crt can also be copied to /root/domain.crt /etc/docker/certs.d/ip-172–31–82–125.ec2.internal:5000/ directory at registry (private-docker-hub) node.
After this setting, we can pull and push images at the clients with a secure connection.
Creating the Authentification File
In the registry, for authentication, we will use an username and a password. To create the password, we will need htpasswdpackage to be installed.
If this package is not installed, for ubuntu-based Linux OS;
sudo apt install apache2-utils -y
For fedora-centos-based Linux OS;
sudo yum install httpd-tools -y
After verification of the presence of htpassw the package, we can create a folder to go on our journey. Let’s create the folders to hold the password file;
mkdir -p docker-hub/auth
This is the folder to store our password file. Next, the password for a selected user can be created. Let’s create a username and password.
cd docker-hub/auth
htpasswd -Bc registry.password clarusway
The last parameter is the name of the user; in this case clarusway. After executing the command, you will be prompted to enter your password. In this study, clarusway is selected for both username and password.
Final docker-compose files with Certification Authorization Key and username and password authentication;
version: '3'
services:
  docker-registry:
    image: registry:2
    restart : always
    container_name: docker-registry
    ports:
    - "5000:5000"
    environment:
      REGISTRY_HTTP_TLS_CERTIFICATE: /certs/domain.crt
      REGISTRY_HTTP_TLS_KEY: /certs/domain.key
      REGISTRY_AUTH: htpasswd
      REGISTRY_AUTH_HTPASSWD_REALM: Registry Realm
      REGISTRY_AUTH_HTPASSWD_PATH: /auth/registry.password
      REGISTRY_STORAGE_FILESYSTEM_ROOTDIRECTORY: /data
    volumes:
      - ./certs:/certs
      - ./auth:/auth
      - ./data:/data
docker-registry-ui:
    image: konradkleine/docker-registry-frontend:v2
    restart : always
    container_name: docker-registry-ui
    ports:
    - 443:443
    environment:
      ENV_DOCKER_REGISTRY_HOST: ip-172-31-82-125.ec2.internal
      ENV_DOCKER_REGISTRY_PORT: 5000
      ENV_USE_SSL: "yes"
      ENV_DOCKER_REGISTRY_USE_SSL: 1
    volumes:
      - ./certs/domain.crt:/etc/apache2/server.crt:ro
      - ./certs/domain.key:/etc/apache2/server.key:ro
The folder structure should be like this;
docker-hub
├── auth
│   └── registry.password
├── certs
│   ├── domain.crt
│   └── domain.key
├── data
└── docker-compose.yaml
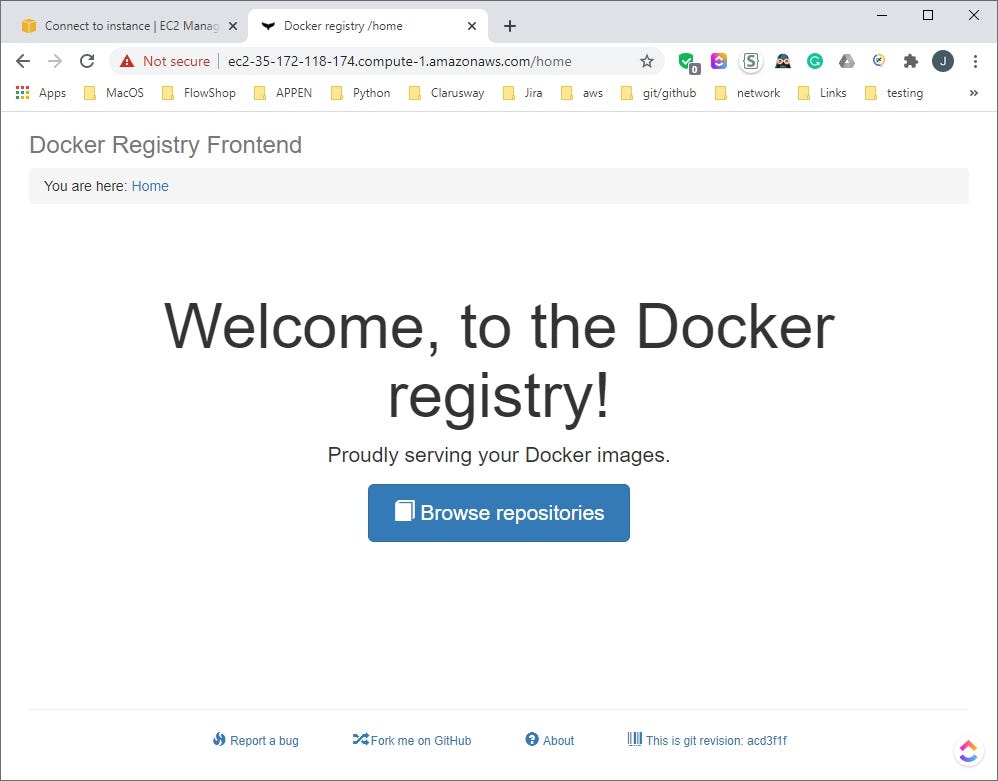
Now, run the docker-compose under docker-hub directory. Let’s check the web interface. When the default page loaded, we see the Welcome Screen. After hitting the Browse repositories button, a login attempt is observed.
Sample Usage At Clients
The client should log in and use the reachable IP(DNS)&port number of this registry to pull and push the images.
After authentication setting activation, we have to log in to ip-172–31–82–125.ec2.internal:5000 to pull and push the images at the clients.
docker login ip-172-31-82-125.ec2.internal:5000
docker pull ip-172-31-82-125.ec2.internal:5000/my-alpine
docker tag:tag ip-172-31-82-125.ec2.internal:5000/:tag
docker push ip-172-31-82-125.ec2.internal:5000/:tag
A sample image pull showcase is as follows:
[ec2-user@ip-172-31-45-163 ~]$ docker login ip-172-31-82-125.ec2.internal:5000
Username: clarusway
Password:
WARNING! Your password will be stored unencrypted in /home/ec2-user/.docker/config.json.
Configure a credential helper to remove this warning. See
https://docs.docker.com/engine/reference/commandline/login/#credentials-store
Login Succeeded
[ec2-user@ip-172-31-45-163 ~]$ docker pull ip-172-31-82-125.ec2.internal:5000/my-alpine:latest
latest: Pulling from my-alpine
Digest: sha256:074d3636ebda6dd446d0d00304c4454f468237fdacf08fb0eeac90bdbfa1bac7
Status: Downloaded newer image for ip-172-31-82-125.ec2.internal:5000/my-alpine:latest
ip-172-31-82-125.ec2.internal:5000/my-alpine:latest
[ec2-user@ip-172-31-45-163 ~]$
I hope this study addresses the issues of hosting and use a private container registry. You can freely and securely use the containers in popular tools like Docker, contained, Mesos Containerizer, CoreOS rkt, and LXC Linux Containers. I have explained how to use private registries with Kubernetes in the “How to use images from a private container registry for Kubernetes: AWS ECR, Hosted Private Container Registry”.