DevOps engineers have many responsibilities for maintaining products and resources. When DevOps engineers need to migrate data from one server/bucket to another, they need to select a command to do that.
rclone is the the most popular way to migrate data from one server to another. If you need to transfer data from one cloud provider’s bucket or spaces to another, you can choose rclone command line tool.
Let’s see the details of how to migrate buckets or spaces from Amazon S3 to Google
What is rclone Command?
Rclone is a command line tool to manage files on cloud storage according to rclone.org. It is a feature rich alternative to cloud vendors’ web storage interfaces. Over 40 cloud storage products support rclone including S3 object stores, business & consumer file storage services, as well as standard transfer protocols.

AWS S3 Bucket is an object storage service designed to make it easy and cost-effective to store and serve large amounts of data. If you have previously relied on other object storage services, migrating data to Buckets may be one of your first tasks. But as you expect, data is a tremendous and vital power, so let me introduce you to The best way to move data: rclone
We will cover how to migrate data from Amazon’s S3 block storage service to Google Cloud Platform Buckets using the rclone command. Before that, we will show you how to install rclone, configure the settings to access both of the storage services, and the commands to use before the migration, synchronize your files, and verify their integrity within Buckets.
Why Do We Need rclone?
rclone helps you to migrate your data from one storage service to another. It can be Digital Ocean’s Spaces, AWS S3 buckets, or GCP Storage Buckets. For this purpose, first, you need to create a rclone machine to do that, as sometimes migrating buckets can take days or weeks. Before you start you need to set your credentials from your Cloud Provider.
How to create AWS API Key and AWS Access Key
If you already have the Access key ID and the Secret access key, you don’t need to follow these steps.
- You need to generate API Key which has permission to manage S3 assets.
- From your AWS management console select your account name and from drop-down menu click My Security Credentials

- At the left hand menu click Users and Add user

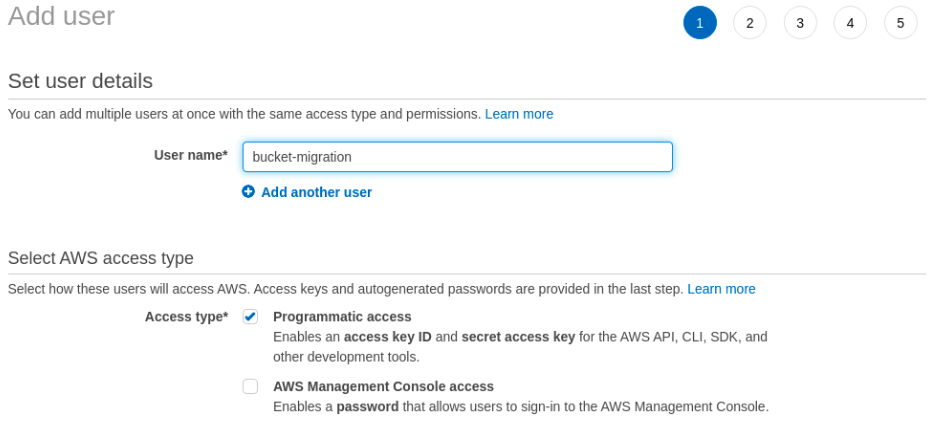
- Write down your username and check programmatic access from the Access Type section, then click Next Permissions
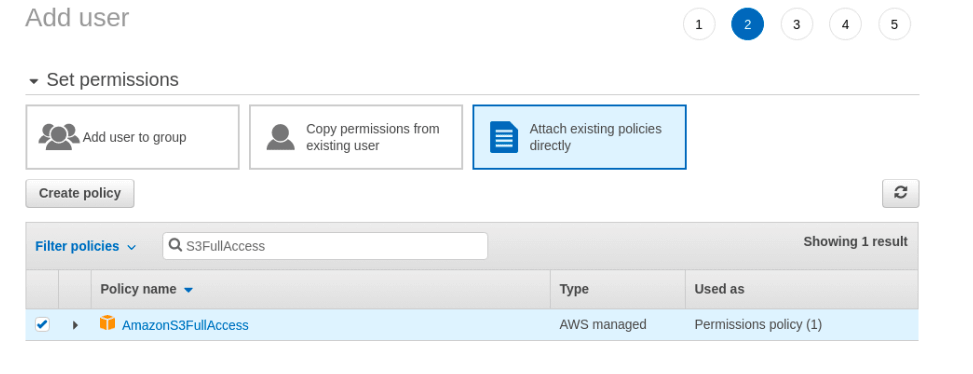
- On the following page, you will see three options, choose the Attach existing policies directly. Then write S3FullAccess in the policy type filter (search bar). Choose the AmazonS3FullAccess policy and then click Next: Tags but we sill no need to tags, so pass this step and then click Next: Review.
- After you review the details of the user click the Create user button and create the user.
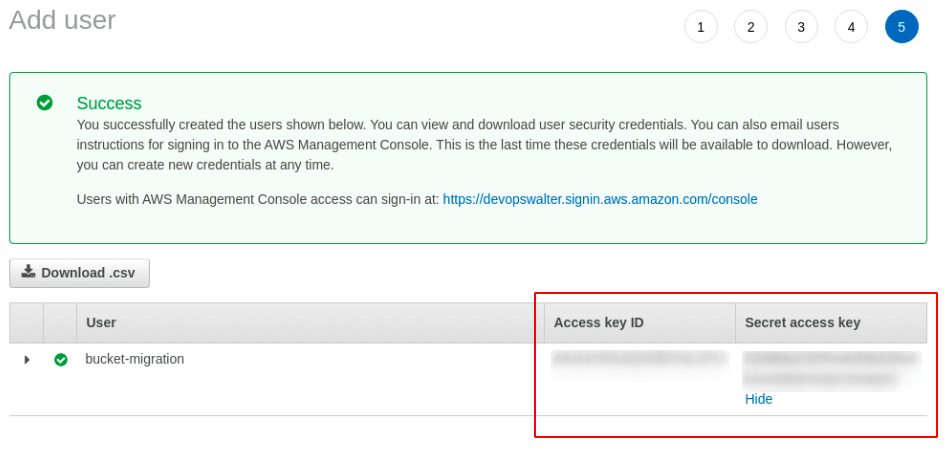
- After you created the user (Complete Level) you will see the credentials for your new user. To view the credentials, click the Show link under the Secret access key column.
- While configuring rclone, we will use Access key ID and the Secret access key so copy them to somewhere else.
- The other thing is the selection of the region and location to transfer. To get this information, go to the S3 service page. From listed buckets, you will see the Region column. But we will not use this string value. We need to find out its code. To do that visit Region codes and take the code for your Region.
How to Create a Service Account and Key at Google Cloud Platform?
If you have a service account that has admin permissions for buckets you can pass the following steps.
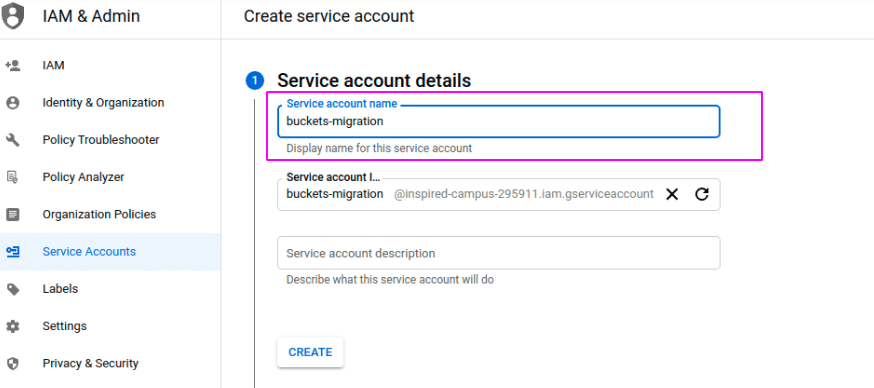
- Go to your GCP Console at the left-hand menu, from Identity select Service Accounts. From the top of the menu, you will see + sing and CREATE SERVICE ACCOUNT. Hit that button.
- You will see three steps, first select the service account name and then click create to pass the first step.
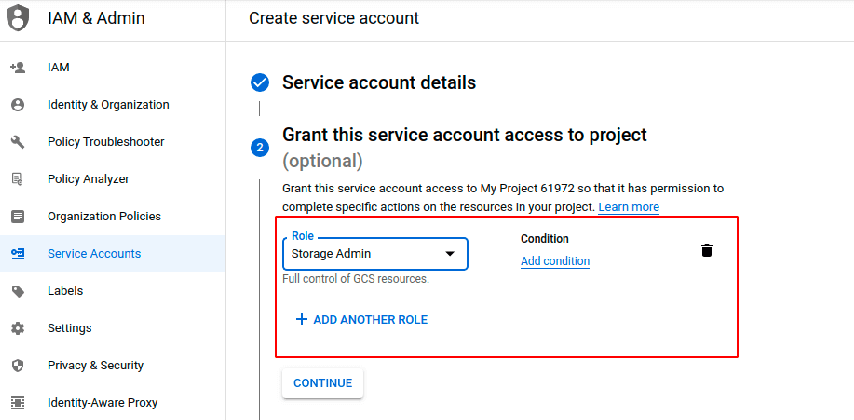
- At the second step, select Role for your service account. So you can select Storage Admin for this service account to create buckets and migration.
- The third step can be passed for our situation, but if you are a DevOps engineer at your organization be aware to assign roles for each user.
- After you create the service account, service accounts will be listed. Select your newly created service account from the list and from right-click three dots and create key

- Then you can select the JSON format.
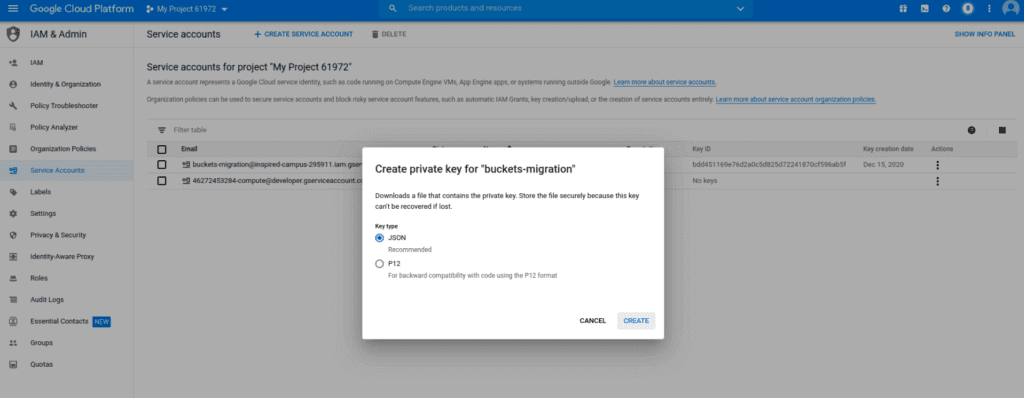
- Your key will be downloaded to your machine. We will use it, so don’t lose 🙂
- So now we need to install rclone
How Can You Install rclone?
I will first explain Linux installation; macOS installation is very similar to Linux installation. While we are doing this and explaining such stuff, if you are still using Windows, that means you have good reasons to use Windows but don’t afraid; we will explain it too
Yes, we prepared the cloud. Took credentials, and all we need is rclone. Go to rclone’s downloads page (https://rclone.org/downloads/) and download the zip file that matches your computer’s operating system. We are assuming that you downloaded to your `Downloads` path.
Linux rclone installation
If your distribution is Ubuntu or Debian, you can update the local package index and install unzip by writing:
clarusway $ sudo apt-get updateclarusway $ sudo apt-get install unzipFor CentOS or Fedora distributions download unzip with:
clarusway $ sudo yum install unzipNext, unzip the archive and move into the unzipped directory:
cd ~/Downloadsunzip rclone*cd rclone-v*To use rclone command on the OS, you should copy the binary file to the /usr/local/bin directory:
sudo cp rclone /usr/local/binFinally, you can create the configuration directory and open up a configuration file with vim or nano text editor to define our S3 and GCP Buckets credentials:
mkdir -p ~/.config/rclonevim ~/.config/rclone/rclone.confThe creation of the conf file is optional but, highly recommended. You can create the conf file either manually or with rclone config command options.
For now, just press :wq to save the blank file, we will fill it in after the other O.S. installation. Linux users can pass the following installation steps 🙂
MacOS rclone installation
Hello dear macOS users, go to your rclone zip file and unzip it:
cd ~/Downloadsunzip -a rclone*cd rclone-v*Then move the rclone binary to the /usr/local/bin directory:
sudo mkdir -p /usr/local/binsudo cp rclone /usr/local/binFinally, you can create the configuration directory with vim or nano text editor and open up a configuration file:
mkdir -p ~/.config/rclonenano ~/.config/rclone/rclone.confThe creation of the conf file is optional but, highly recommended. You can create the conf file either manually or with `rclone config` command options.
Windows rclone installation
- If you are running Windows, don’t panic and upset. Begin by navigating to the Downloads directory, select the rclone zip file and Extract All.
- The rclone.exe must be run from the command line (cmd). Open Windows Command Prompt, if you don’t know how to do that, here are some tips for that
Inside the shell, navigate to the rclone path you extracted by typing:
cd “%HOMEPATH%\Downloads\rclone*\rclone*”You should know that whenever you want to use the rclone.exe command, you will need to be in this directory.
On macOS and Linux, we run the rclone by typing rclone, but on Windows, the command is called rclone.exe. Throughout the rest of this guide, we will be providing commands as rclone, so be sure to substitute rclone.exe each time when running on Windows.
Next, you should create the configuration directory and a configuration file:
mkdir “%HOMEPATH%\.config\rclone”notepad “%HOMEPATH%\.config\rclone\rclone.conf”This will open up your text editor with an empty file. After the installation, you will learn how to configure your object storage accounts in the configuration file.
In the next article, our topic will be, “How can we use rclone to transport buckets and spaces?”


