This article will explain how to create a WordPress page and database with Docker-Compose using the secret file. First of all, you do not need to know everything; Google and documentation pages will be enough. So, let’s go to https://docs.docker.com/compose/ and learn what docker-compose is and see all the details here.
“Compose is a tool for defining and running multi-container Docker applications. With Compose, you use a YAML file to configure your application’s services. Then, with a single command, you create and start all the services from your configuration.”
As you see from the documentation above, we will use a YAML file, and we can install multi containers thanks to docker-compose.
After understanding the definition, we are going to investigate how to run a WordPress with docker. So, we need to go to the docker documentation page again. Let us see: https://docs.docker.com/samples/wordpress/
Step-1: Creating docker-compose.yml file
Let’s create an empty directory and enter the directory we created.

And then write and enter docker-compose.yml thanks to the VSCode menu on the left side. You will see an empty file on the right side like below:

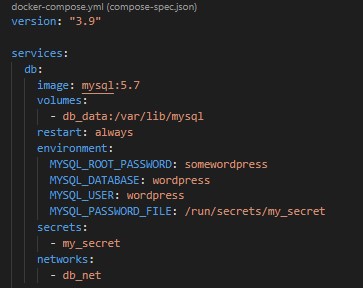
Now, you can start to write our script. While writing the script, you can use the docker documentation whenever you need it. I used some scripts from the documentation by changing and rewriting some script parts.
Step-2: Explanation of the YML file
In a docker-compose.yml file, we must first type the “version. I use version 3.9.
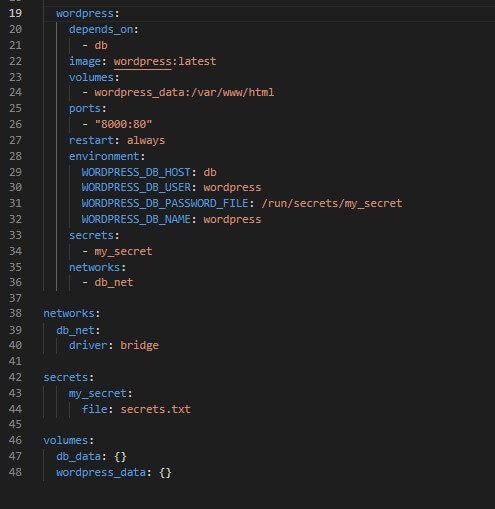
And then, thanks to docker-compose, we can install multi containers in a file. I run a database and WordPress in this project under “services” such as “db” and “wordpress”.
And then, we need “volumes” and “networks”. After we type these blocks, we must mention and connect them under “services”. Otherwise, they do not run properly.
Please examine the codes on the docker page (use the link above) and see some slight differences between my codes and the codes in the documentation.
And finally, let me add a “secret” object to my code. This is optional. Usually, you can write your passwords as open. In that case, everyone can see your passwords easily. This is not the best practice. Therefore, I want to use a secret file as a txt file to write my passwords in it. Let’s create a txt file like the below:
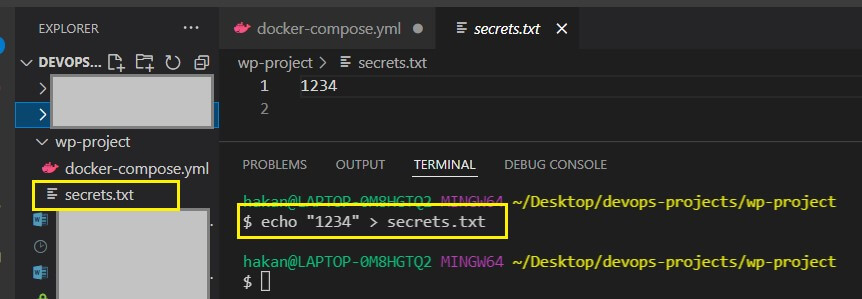
Now, I need to mention “secrets” in my service and a “secrets” object to connect with each other. Please mind the path of the secret file here. YML file and secret file are in the same path. So, we need to write just the name of the secret file. Otherwise, we should write the absolute path of the secret file there.
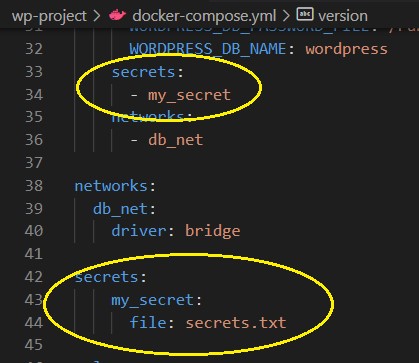
I must explain the last point in the YML file. Due to using the secret file in our script, we need to write password lines with “_FILE” and address the secret path there. When we use “secrets”, the docker engine creates the “/run/secret” directory.
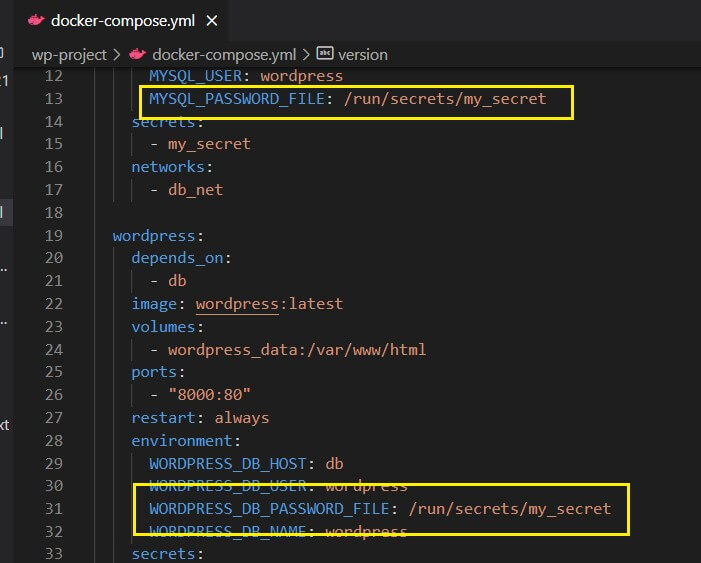
Yes, we completed our script. Let us run it.
Step-3: Run the script
Let’s go to the documentation (https://docs.docker.com/samples/wordpress/ ) and see this:
“Now, run docker-compose up -d from your project directory.
This runs docker-compose up in detached mode, pulls the needed Docker images, and starts the WordPress and database containers, as shown in the example below.”
If we run the command without “-d” we cannot use the terminal and need to open another terminal to manage or watch things. Please see the cursor in the terminal. We can still use the terminal.
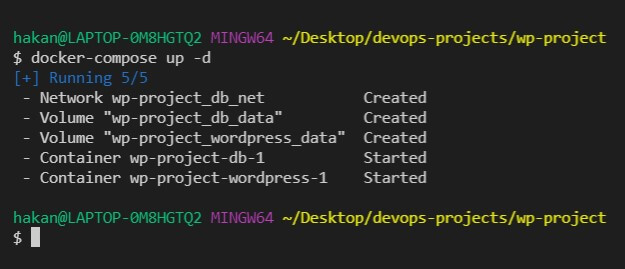
So far, everything has gone well, and we can see our WordPress page. Please enter “localhost:8000” into your browser and see the page below:
(If you see a database connection error, please wait a little bit more)
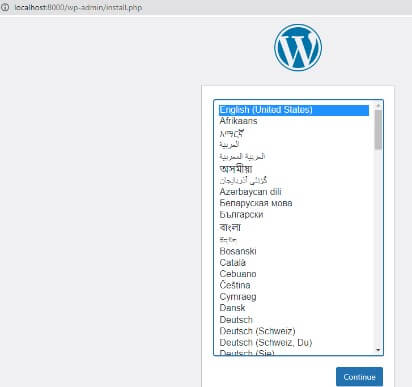
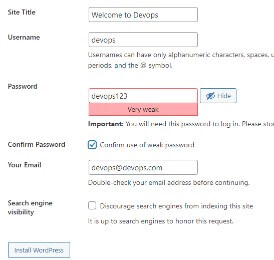
And then go on…here we go. Brilliant job. We have done everything very well.

Step-4: Shutdown and Clean Up
We use “docker-compose down” and remove everything (excluding volumes). For removing the volumes, we should either use “docker-compose down –volumes” or remove them separately using “docker volumes rm <volume_names>”.
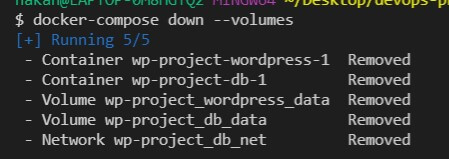
We have finished all. I hope you enjoy it.


