This article will talk about how we configure Ansible to get inventory hosts from Amazon Web Services EC2 dynamically using the EC2 plugin.
As you know, Ansible is an open-source IT automation tool. It is very straightforward and easy to use but so powerful. Ansible is suitable for managing all environments, from small setups with a few instances to big ones with hundreds of instances.
For AWS infrastructures, Ansible is a good option. But if you work with AWS, most probably you are using ASG, and your inventory varies with scale in and out instances in response to the demands. So static inventory will not work with your needs. You need to track the target hosts automatically.
Ansible has a dynamic external inventory system that has two ways to use external inventory: inventory scripts and the most recent updated inventory plugin.
We will use the EC2 plugin as recommended because it is more up-to-date and easy to use.
Let’s start working with the ec2 dynamic inventory.
Step 1: Pinging the Target Nodes with static inventory
(If you are reading this article, I assume that you have already installed Ansible on your Control node )
As a best practice, I prefer to create a new folder for each project and create a config file in it.
Note: Remember that Ansible will process the below list and use the first file found, all others are ignored.
ANSIBLE_CONFIG(environment variable if set)
ansible.cfg(in the current directory
~/.ansible.cfg(in the home directory
/etc/ansible/ansible.cfg
So, make a directory named dynamic-inventory under the home directory and switch into it.
$ mkdir dynamic-inventory
$ cd dynamic-inventory
Create a file named inventory.txt .
$ sudo vi inventory.txtPaste the content below into the inventory.txt file.
Note: Don’t forget the change the IP addresses of the target nodes and the path of your pem key.
[servers]
db_server   ansible_host=<YOUR-DB-SERVER-IP>   ansible_user=ec2-user  ansible_ssh_private_key_file=~/<YOUR-PEM-FILE>
web_server  ansible_host=<YOUR-WEB-SERVER-IP>  ansible_user=ec2-user  ansible_ssh_private_key_file=~/<YOUR-PEM-FILE>
Create file named ansible.cfg under the the dynamic-inventory directory.
Paste the content below into ansible.cfg file.
[defaults]
host_key_checking = False
inventory=inventory.txt
interpreter_python=auto_silent
Check the inventory.
$ ansible-inventory --graph
Check the connectivity to the target nodes.
$ ansible all -m ping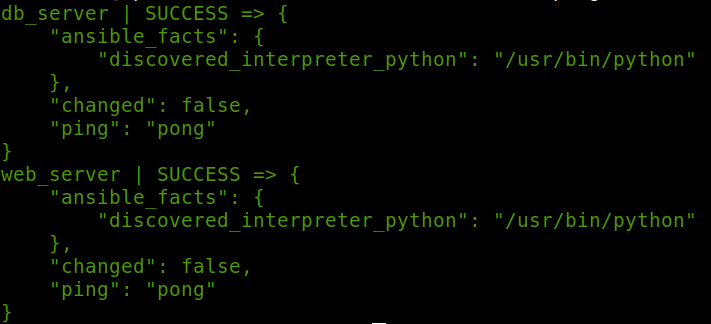
So, that’s great! We have connected to the target nodes with a static inventory.
Step 2: Working With Dynamic Inventory
To working with AWS dynamic inventory, we need boto3 and botocore python modules.
First, install python3 if you haven’t installed it yet.
$ sudo yum install -y python3Install “boto3”
$ sudo pip3 install --user boto3 Create a file named inventory_aws_ec2.yml in the project directory.
Note: The file name needs to be ended with aws_ec2.yaml/yml.
$ vi inventory_aws_ec2.ymlPaste the content below into the inventory_aws_ec2.yml file. As you see that this file begins with defined the plugin: aws_ec2.
Note: In this example, I added two tags to the target nodes (via AWS Console) “Name and task” to groups them. And use filter to see only running instances.
plugin: aws_ec2
regions:
  - "us-east-1"keyed_groups:
  - key: tags.Name
  - key: tags.task
filters:
  instance-state-name : running
compose:
  ansible_host: public_ip_address
But at this point, the Control node needs authentication to access the AWS resources. If you want, you can add your AWS access key and secret to the config file. But I think it is not a safer way, and I prefer to use the IAM role instead. So Ansible will automatically use this role to make the AWS API calls.
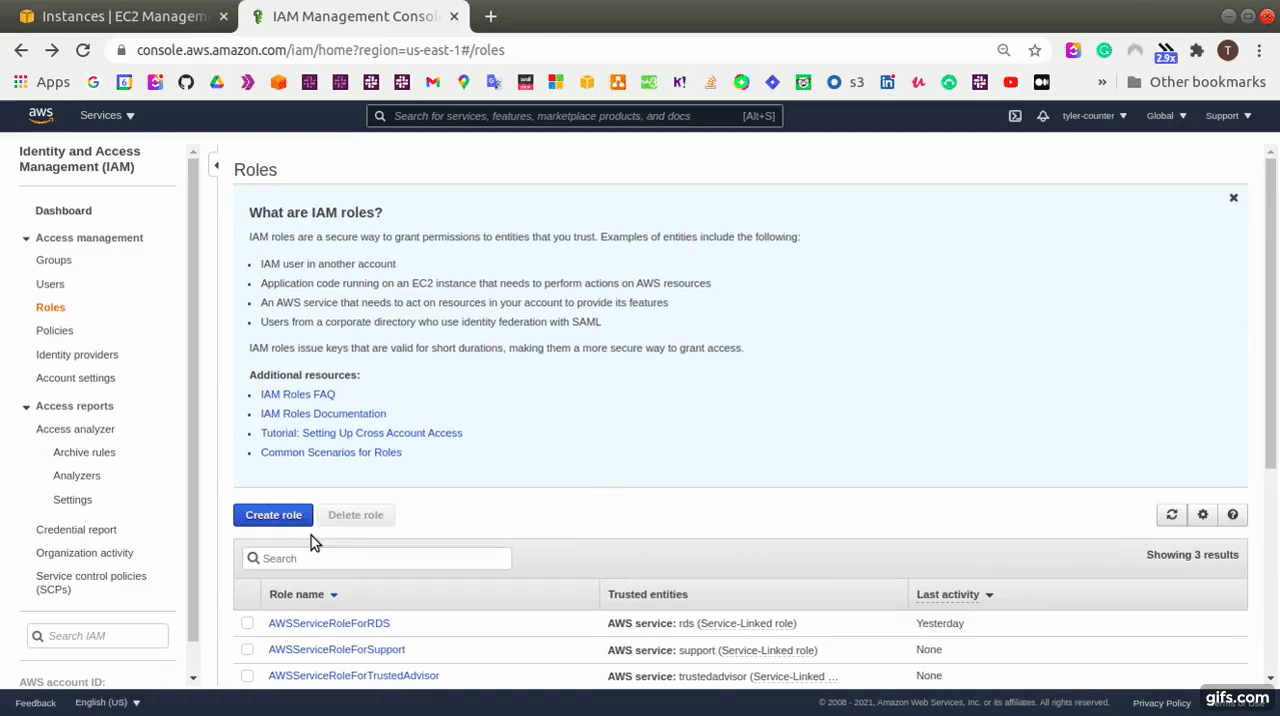
Step 3: Add An IAM Role And Attached It To Control Node
At AWS Console, go to Identity and Access Management (IAM) service and click the “Create role” button and then create a role with “AmazonEC2FullAccess”.
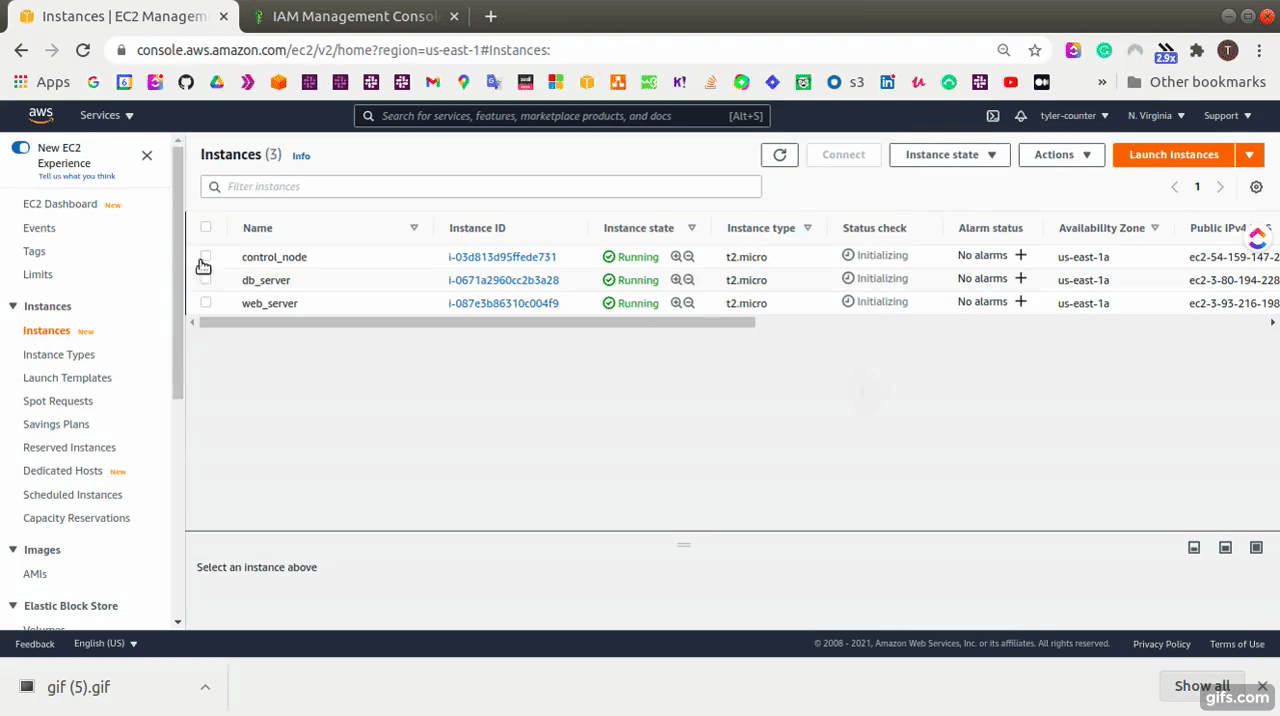
After that, we need to attach this role with the Control node.
- Go to EC2 Dashboard, and select the control-node instance
- Select “actions” → “security” → “modify IAM role”
- Select the role that has “AmazonEC2FullAccess” and save it.
Step 4: Pinging The Target Nodes With Dynamic Inventory
First, check the inventory.
Note: We will use the “-i” flag to refer to the inventory_aws_ec2.yml file because we haven’t changed the inventory variable in the config file yet.
$ ansible-inventory --graph -i inventory_aws_ec2.yml
Note: When we use dynamic inventory, all non-alphanumeric characters in group names and host names are changed with an underscore (_).
Open the ansible.cfg file and change the inventory variable path to use the dynamic inventory file.
[defaults]
host_key_checking = False
inventory=inventory_aws_ec2.yml
interpreter_python=auto_silent
Create a file named ping-playbook.yml and paste the content below.
---
- name: ping them all
  hosts: _servers
  vars:
    ansible_ssh_private_key_file: "/home/ec2-user/tyler.pem"
  tasks:
    - name: pinging
      ping:
Run the command below for pinging the servers.
$ ansible-playbook ping-playbook.yml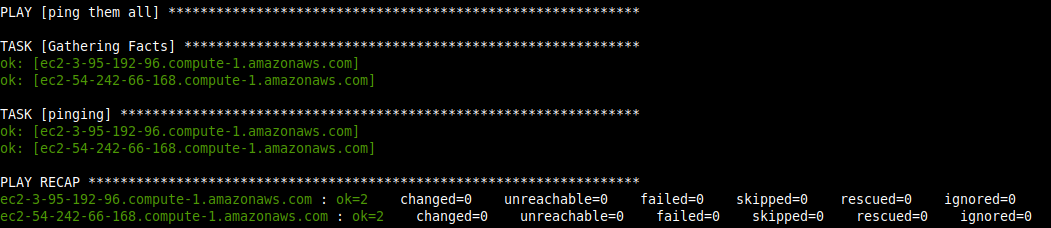
Wonderfull! You have just worked with the EC2 Dynamic inventory
I hope you enjoyed the article and it is helpful for you. Don’t hesitate to ask me any questions regarding this subject. I will continue to share my experience with you mainly about DevOps tools.